Easy Pickled Green Chillies

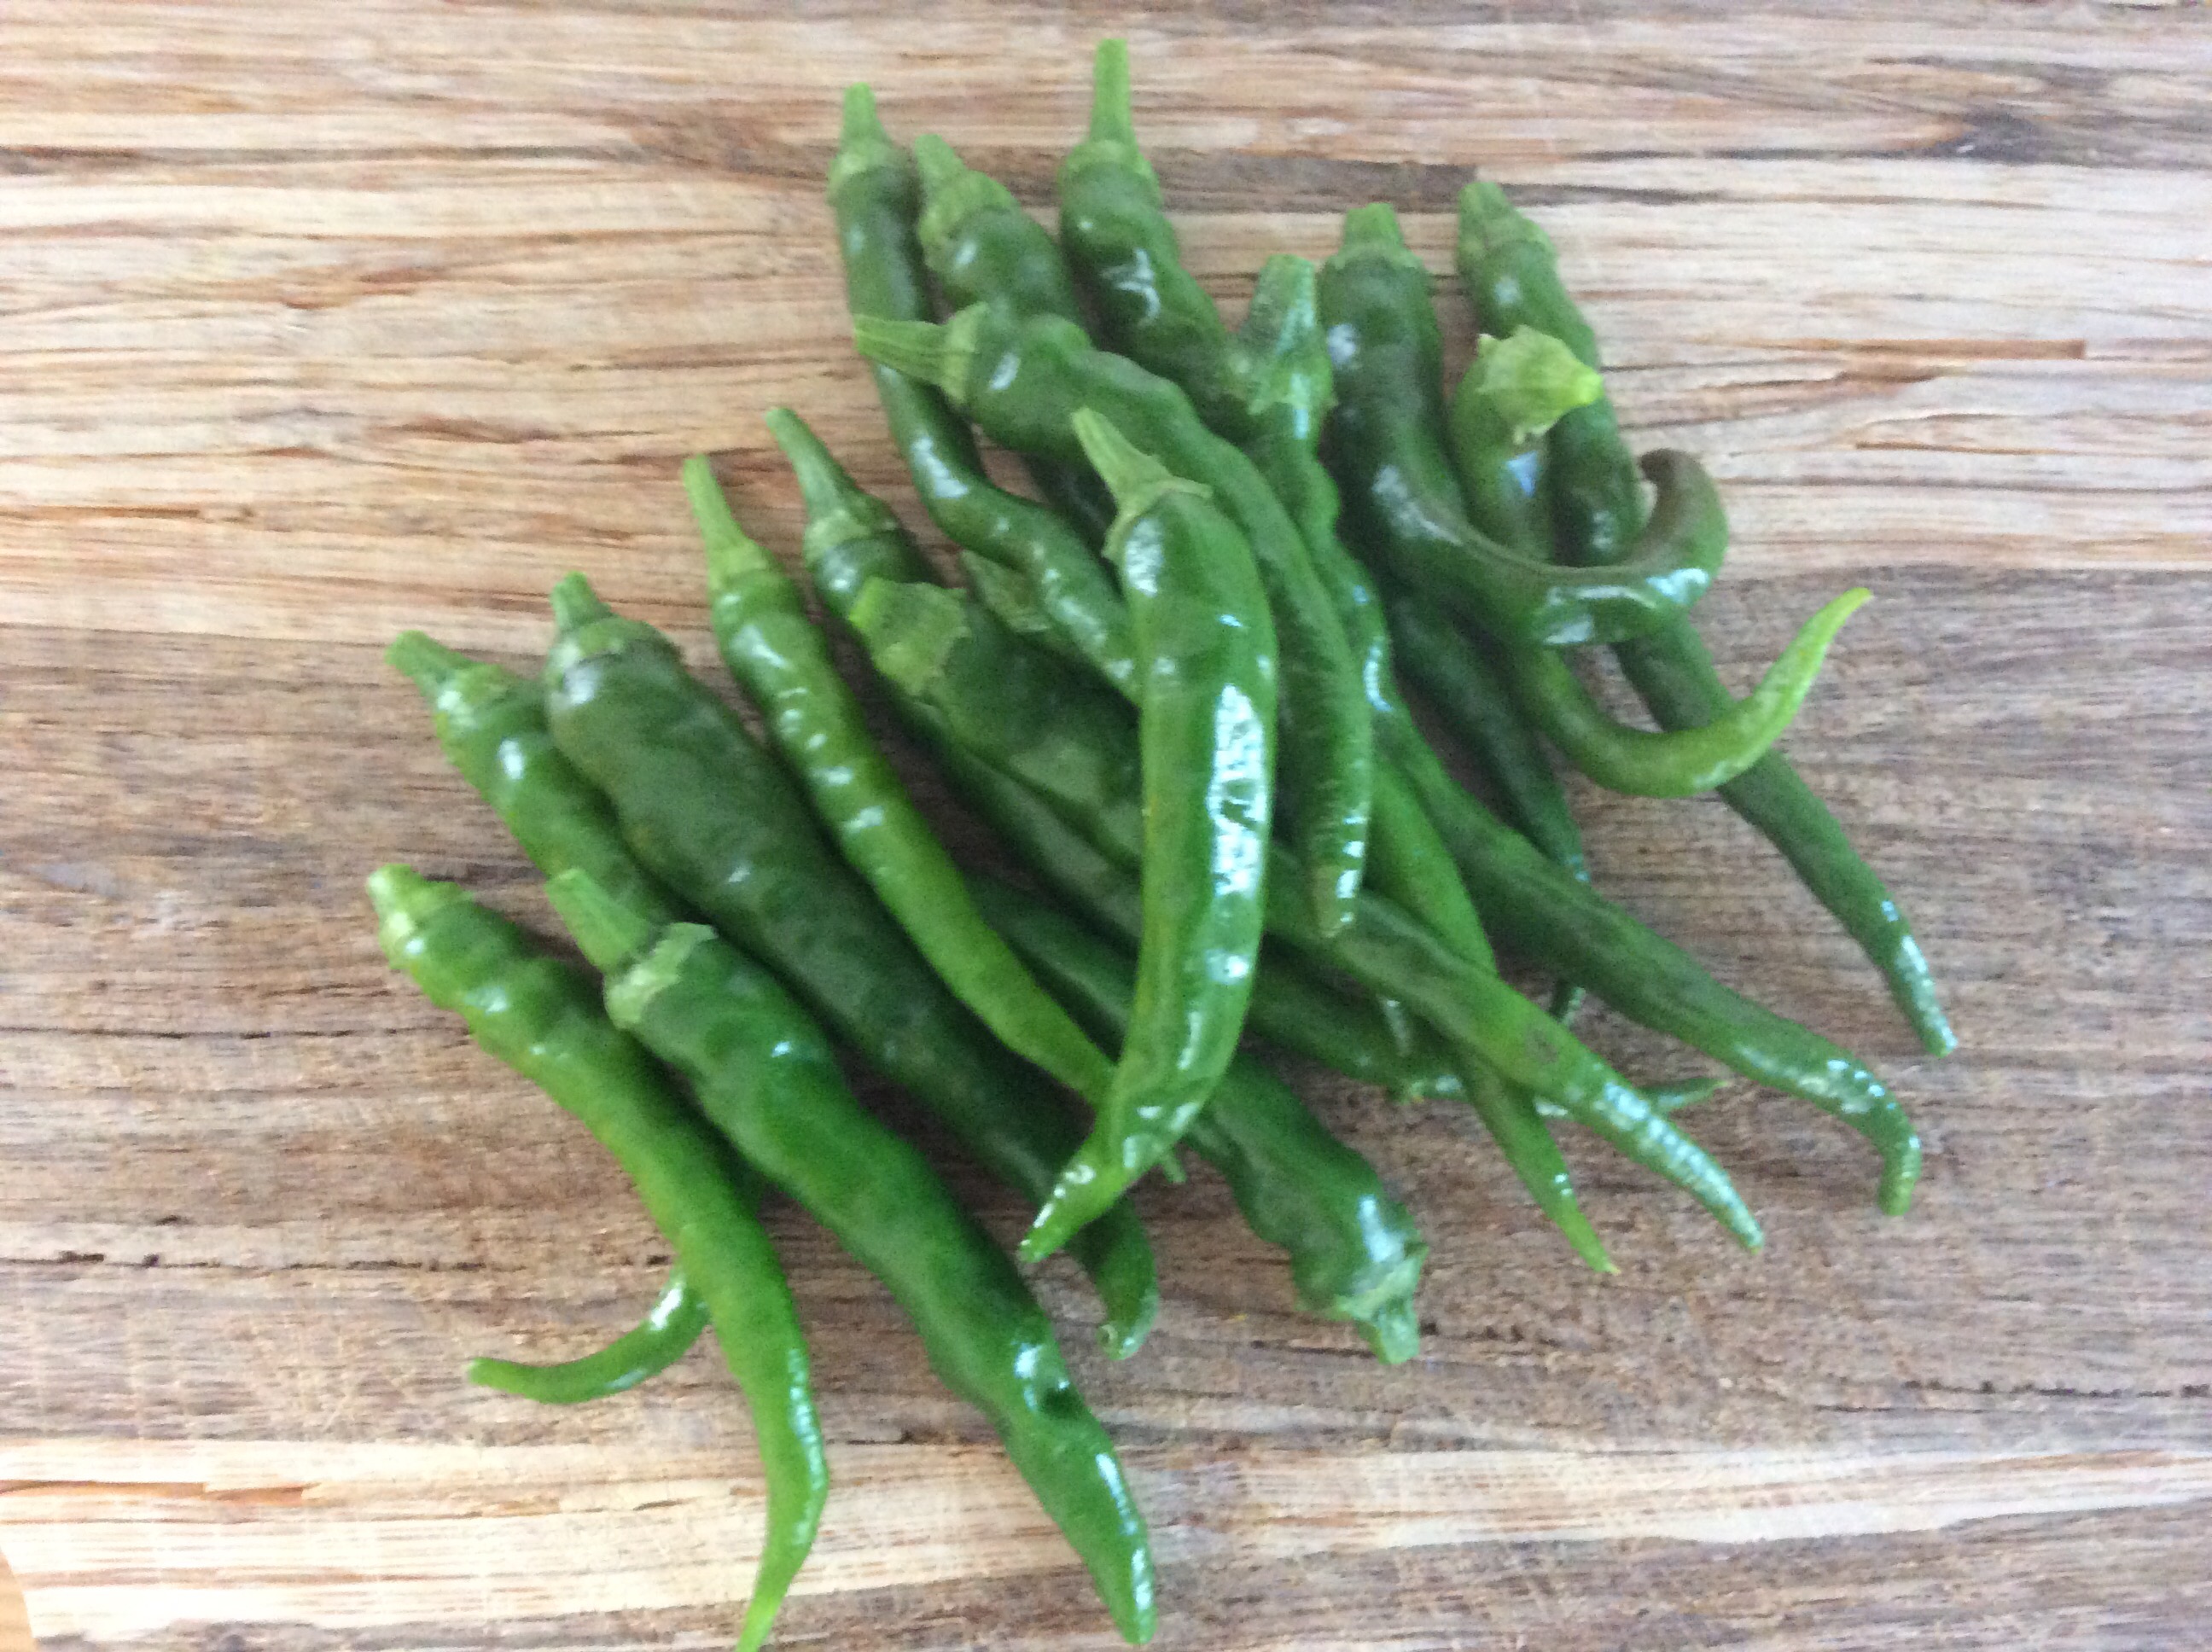
As you may know by now I love a quick and easy tasty recipe. Here we have Easy Pickled Green Chillies. I grew these cayenne peppers in pots on our window sill at home and because they were producing so many of them quite quickly I wanted a way to preserve them for future use. I have picked when green but you can wait and do the same when red.

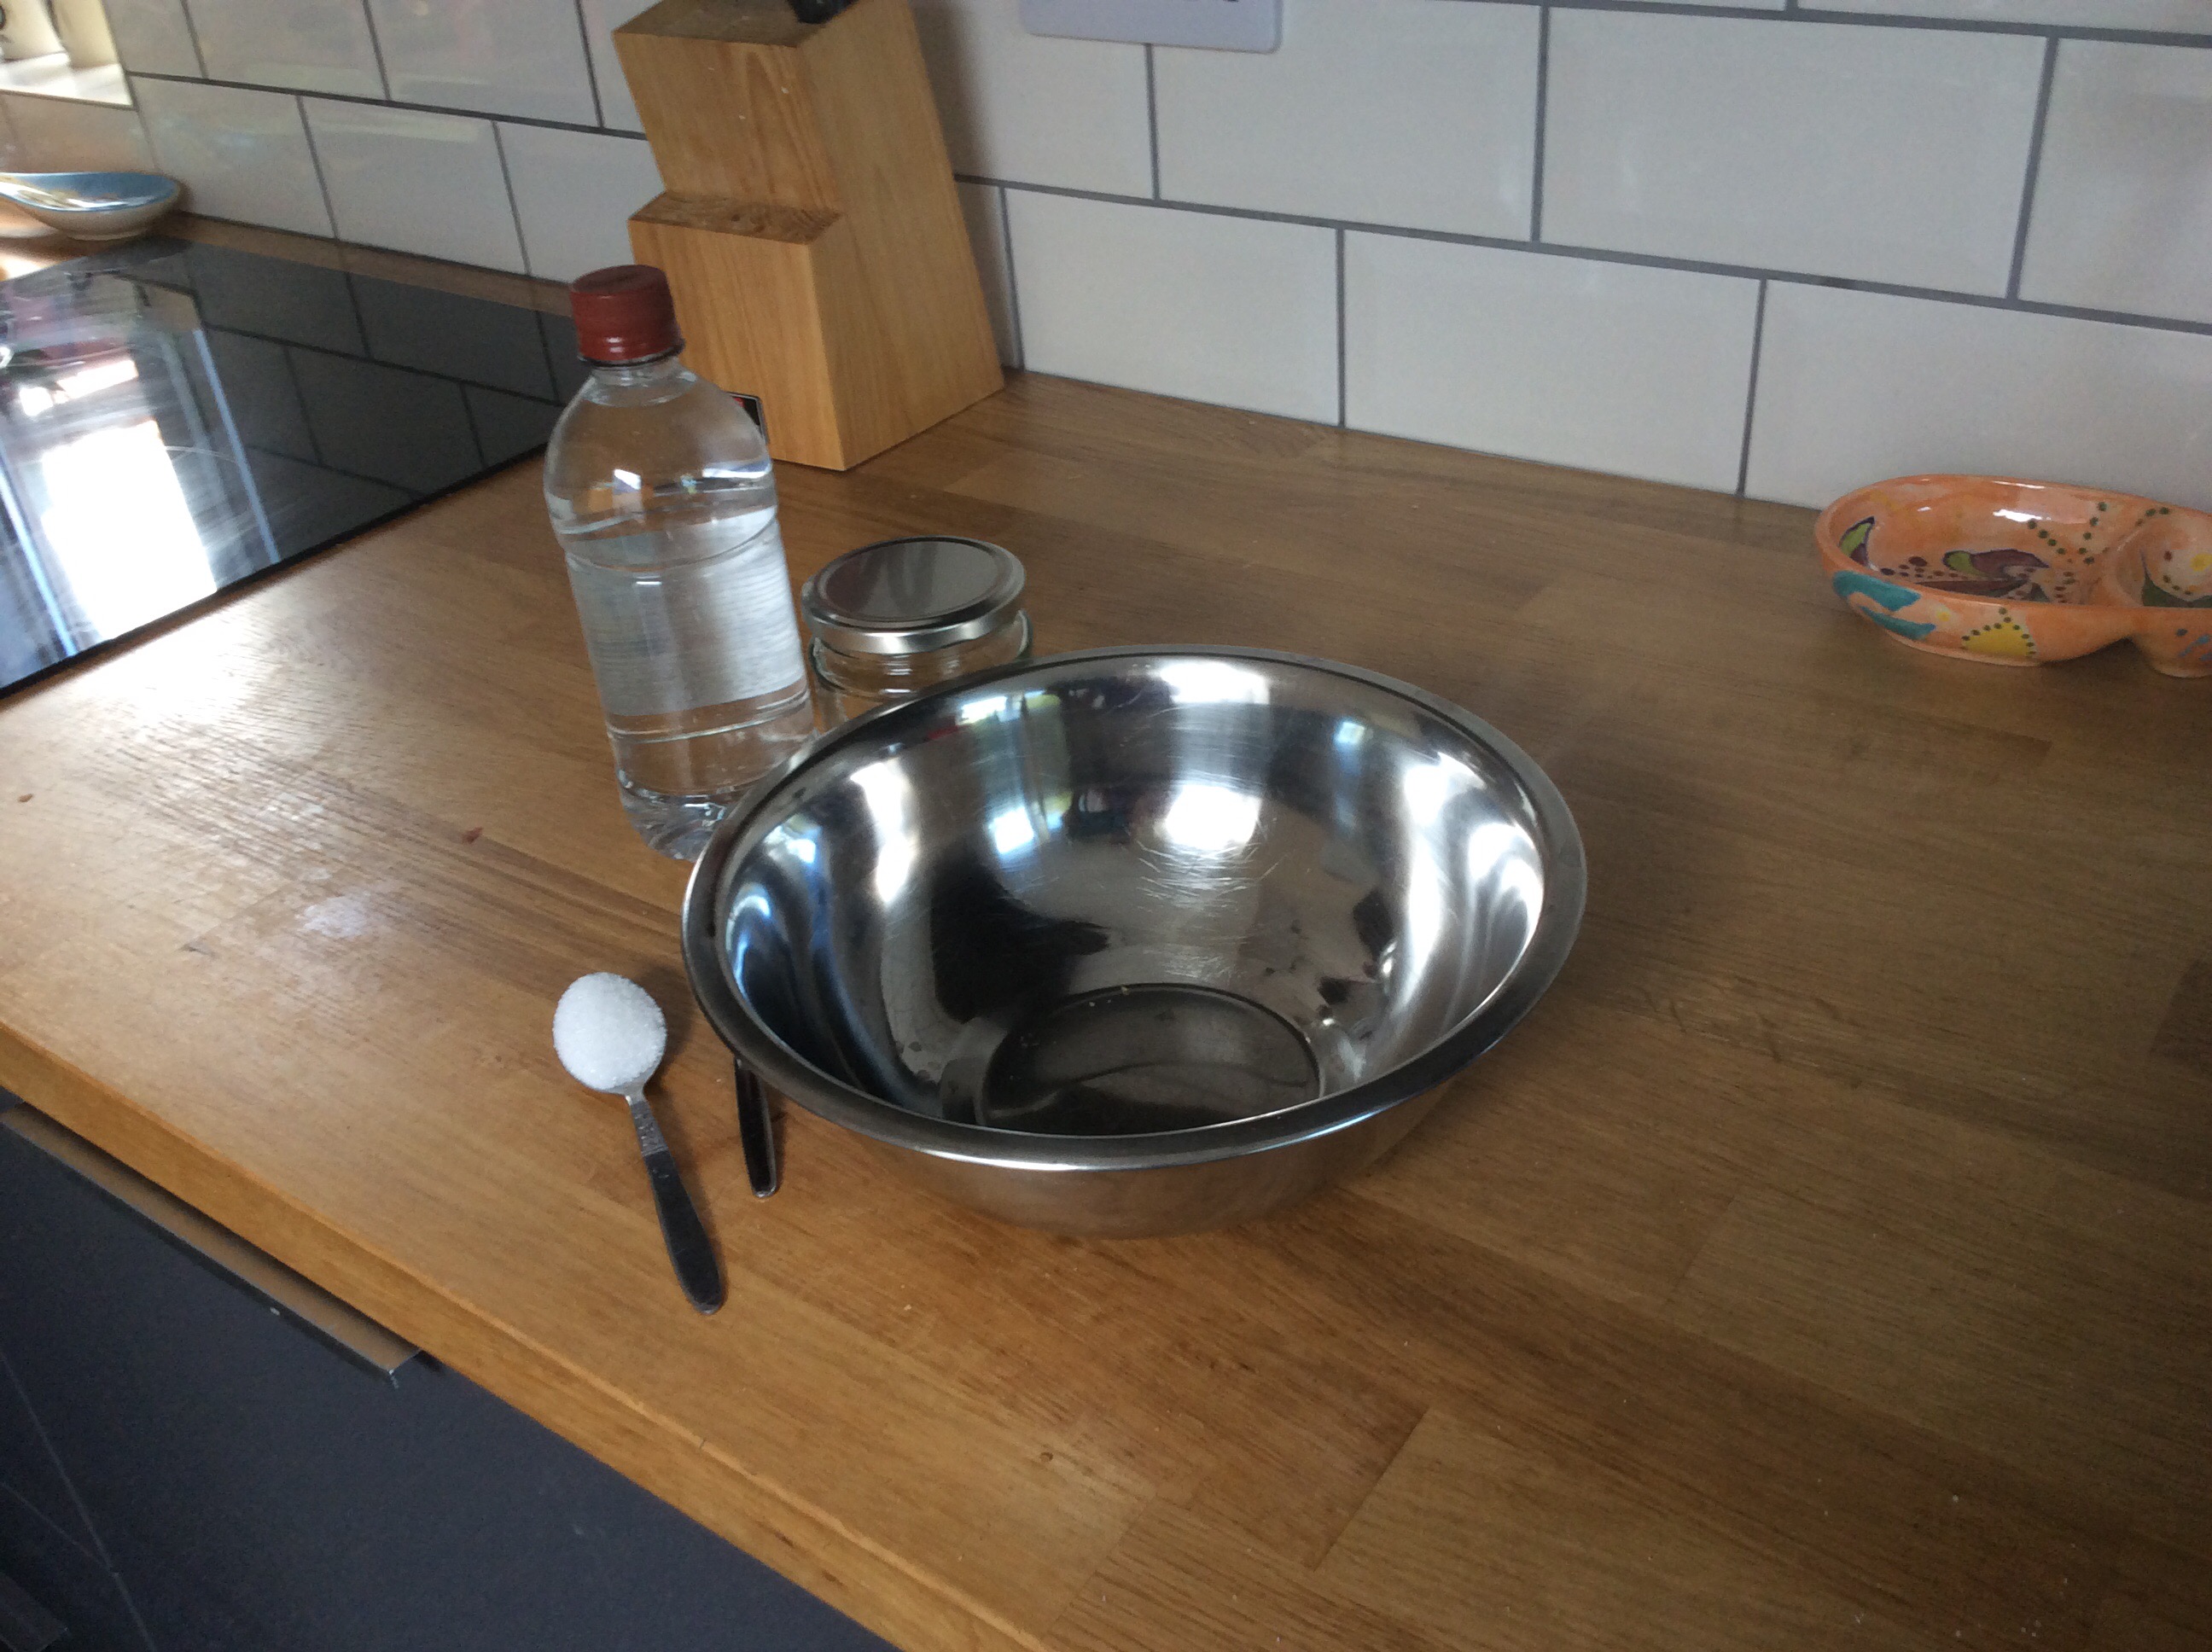
Here are the ingredients you will need for one jam jar size:

Half a jar of clear vinegar.

1.5 teaspoon of sugar

1 teaspoon of salt

A big bunch of green chillies

500ml hot water

OK here’s what you need to do:

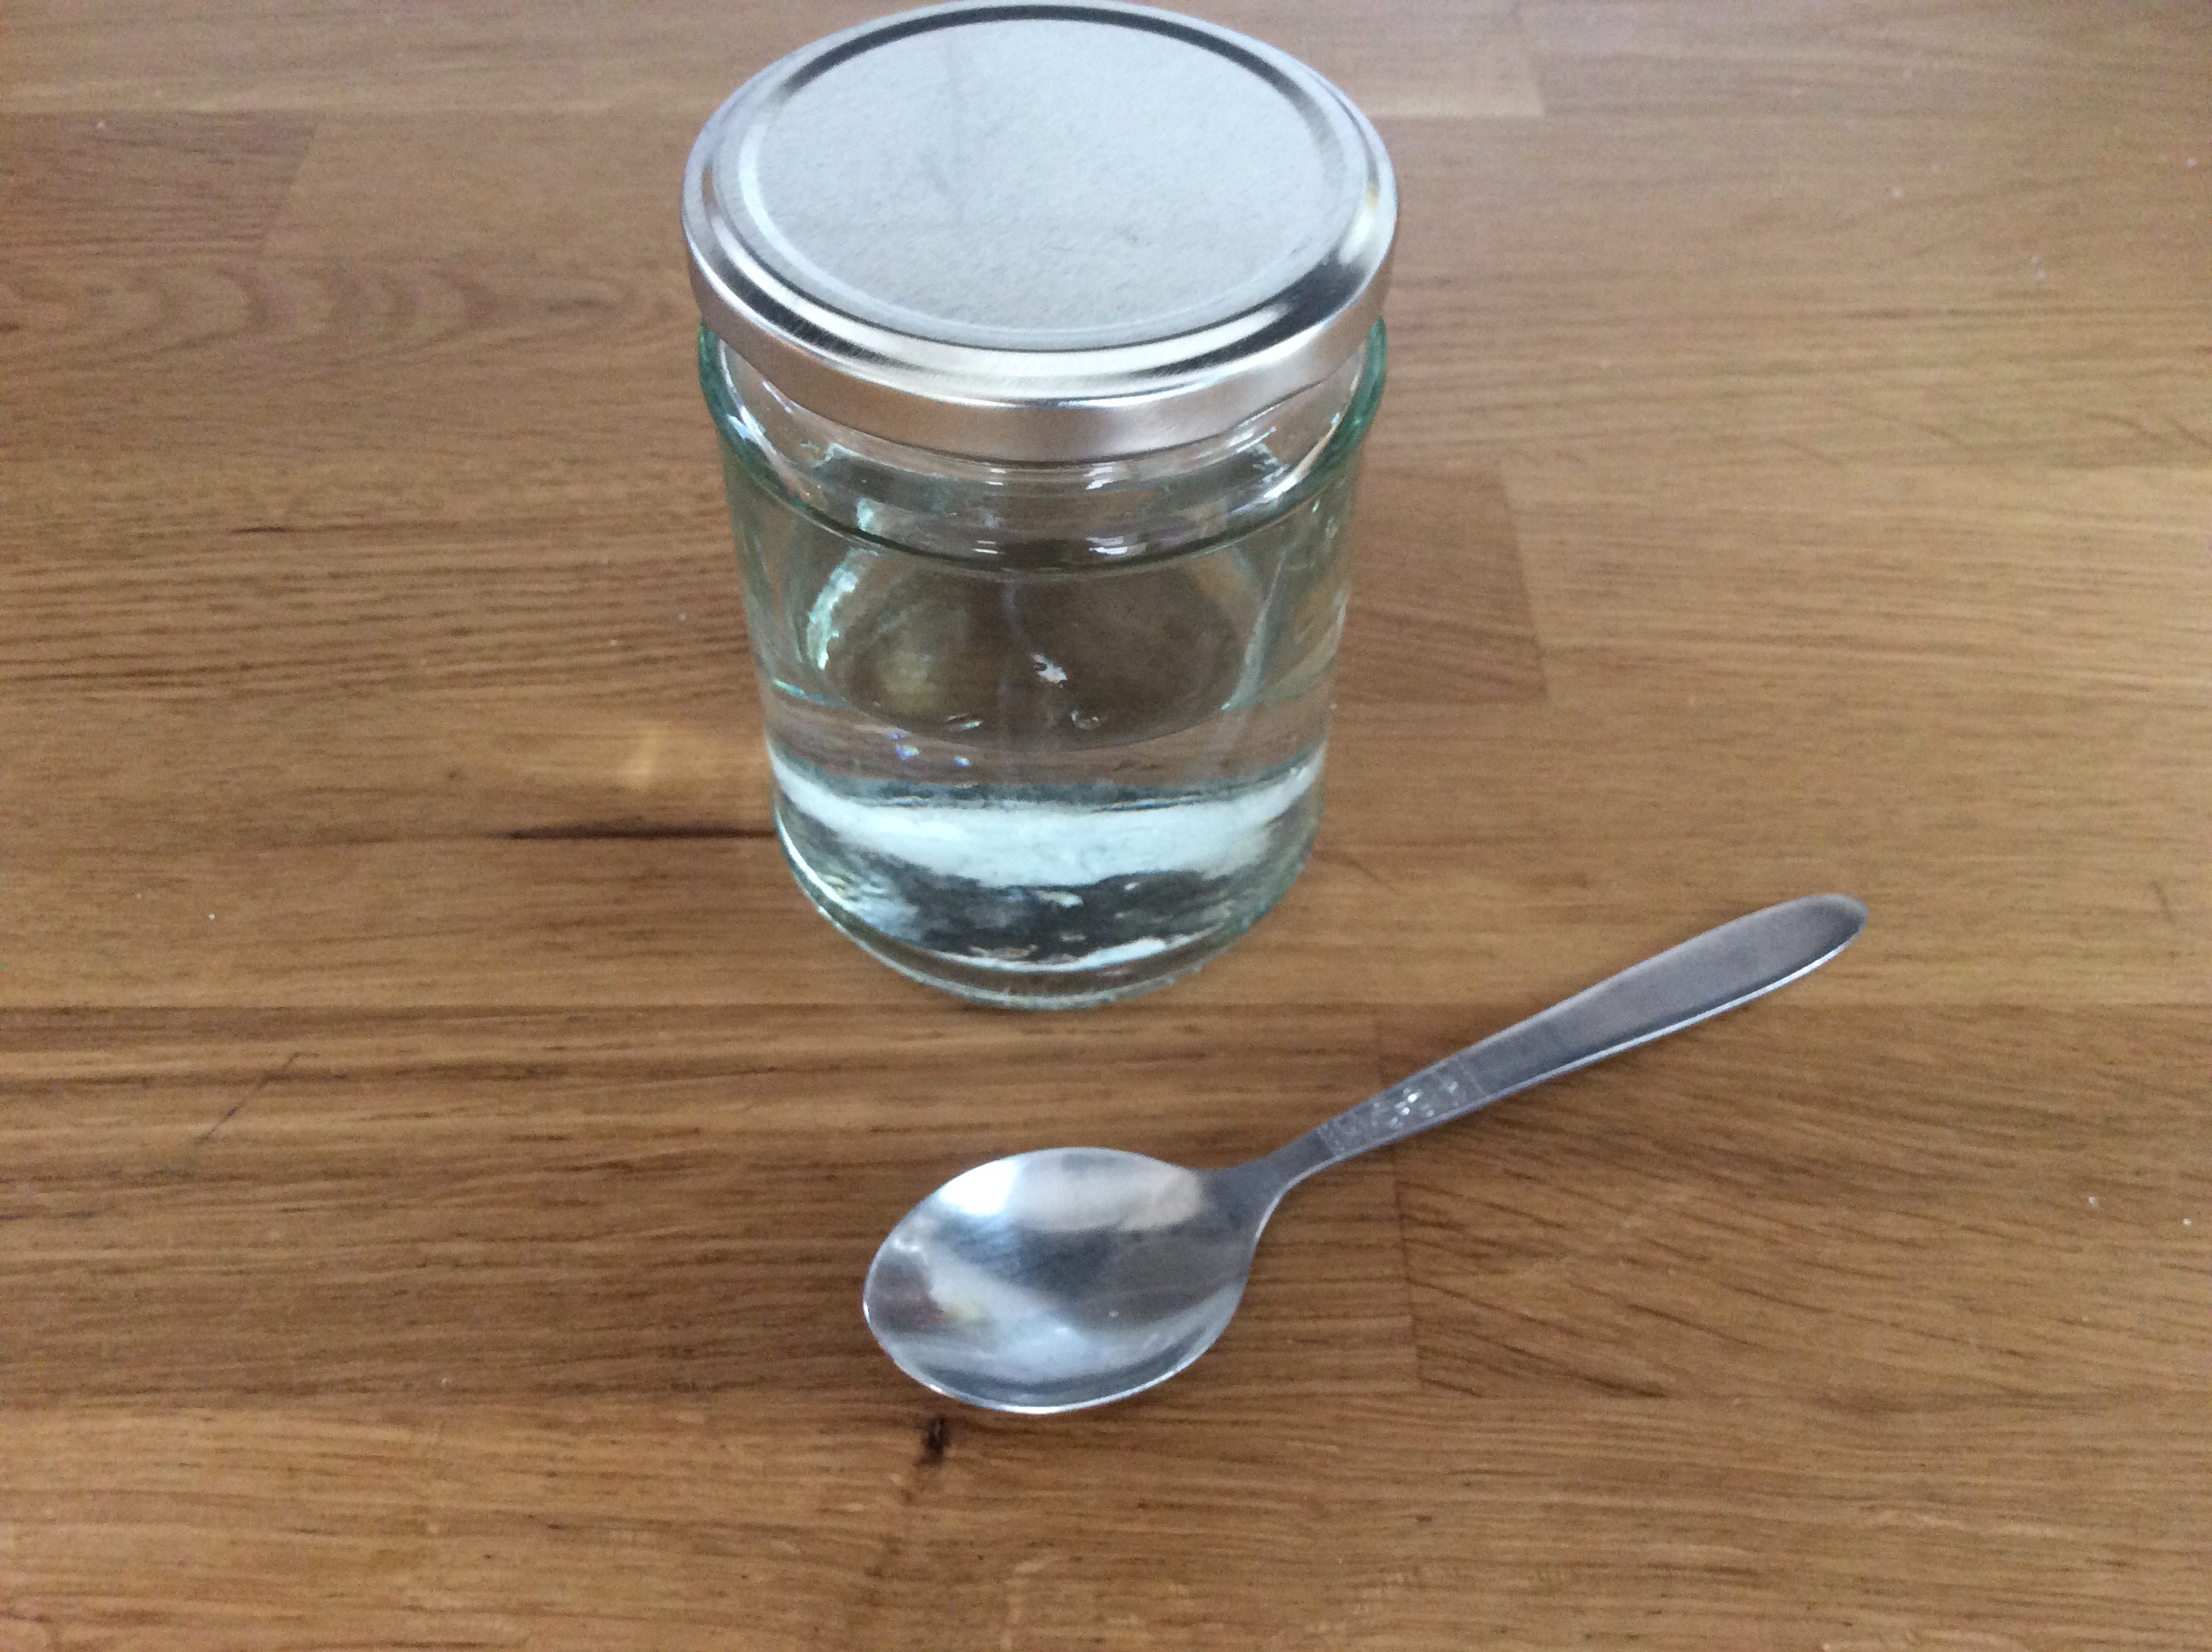
Combine the vinegar with the sugar and salt in the jar you will be using to store them when finished.

Put the lid on and give it a good shake so that the sugar and salt dissolve in the vinegar.

pickled green chillies www.myrealfairy.com

pickled green chillies www.myrealfairy.com

pickled green chillies www.myrealfairy.com

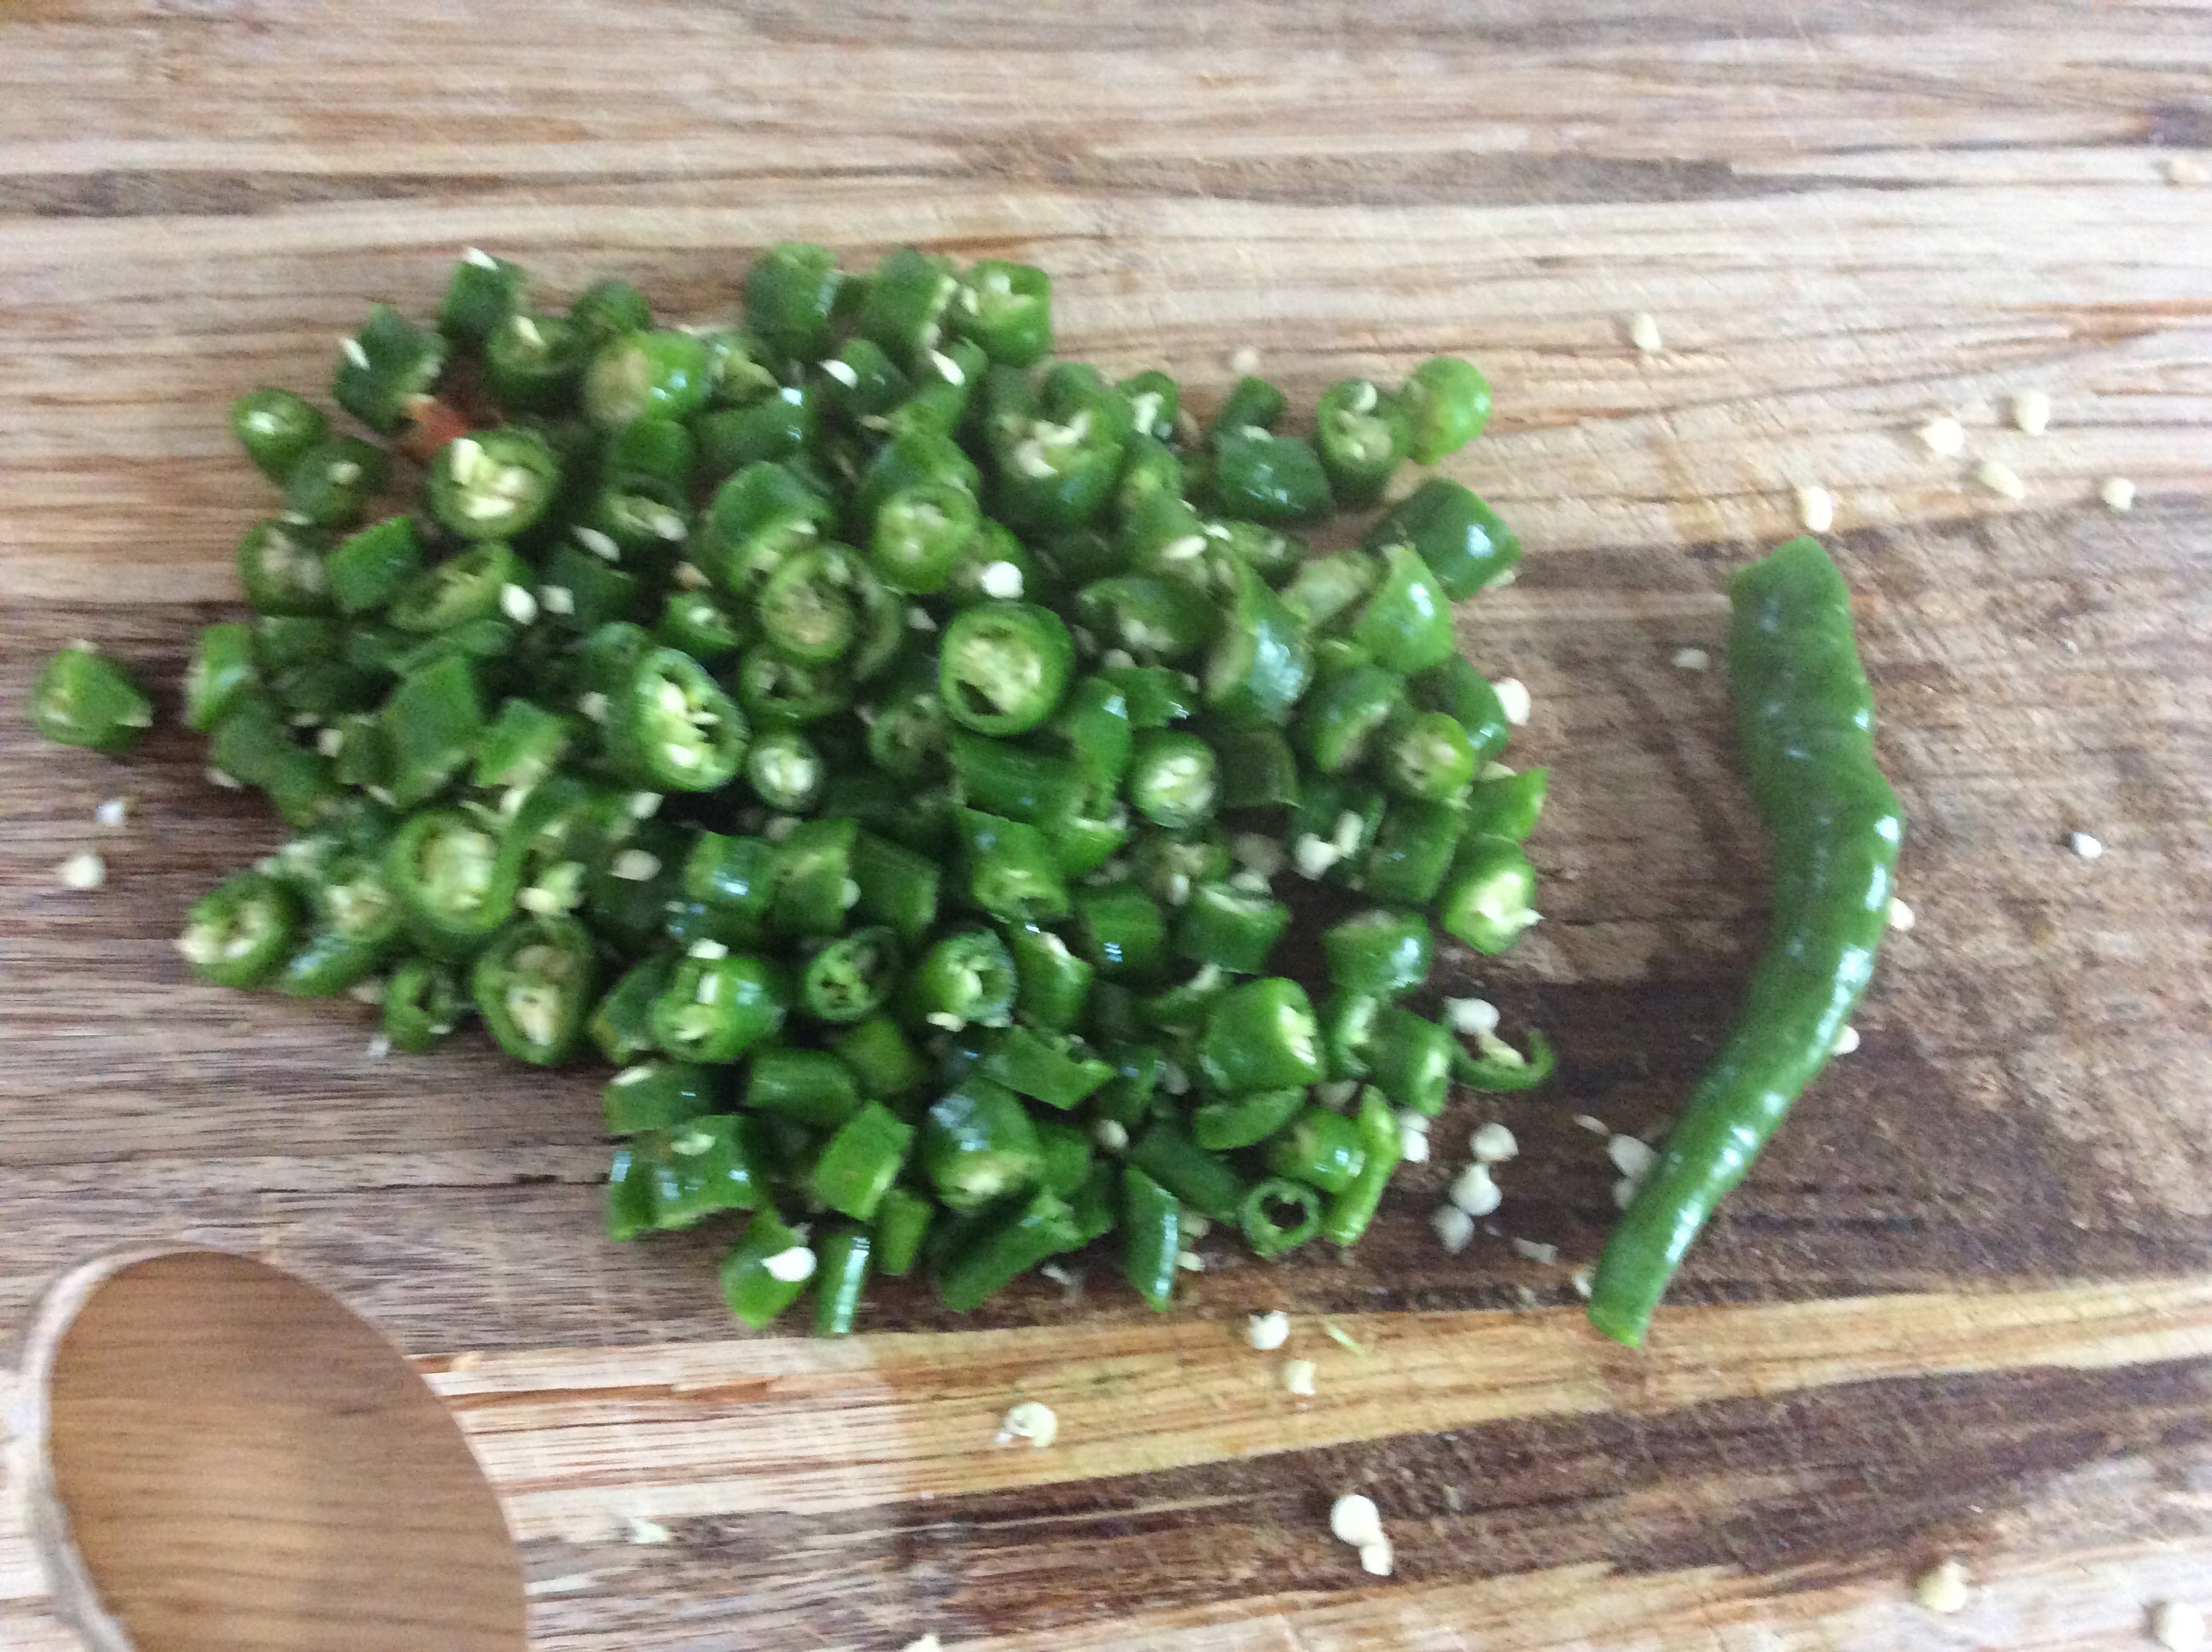
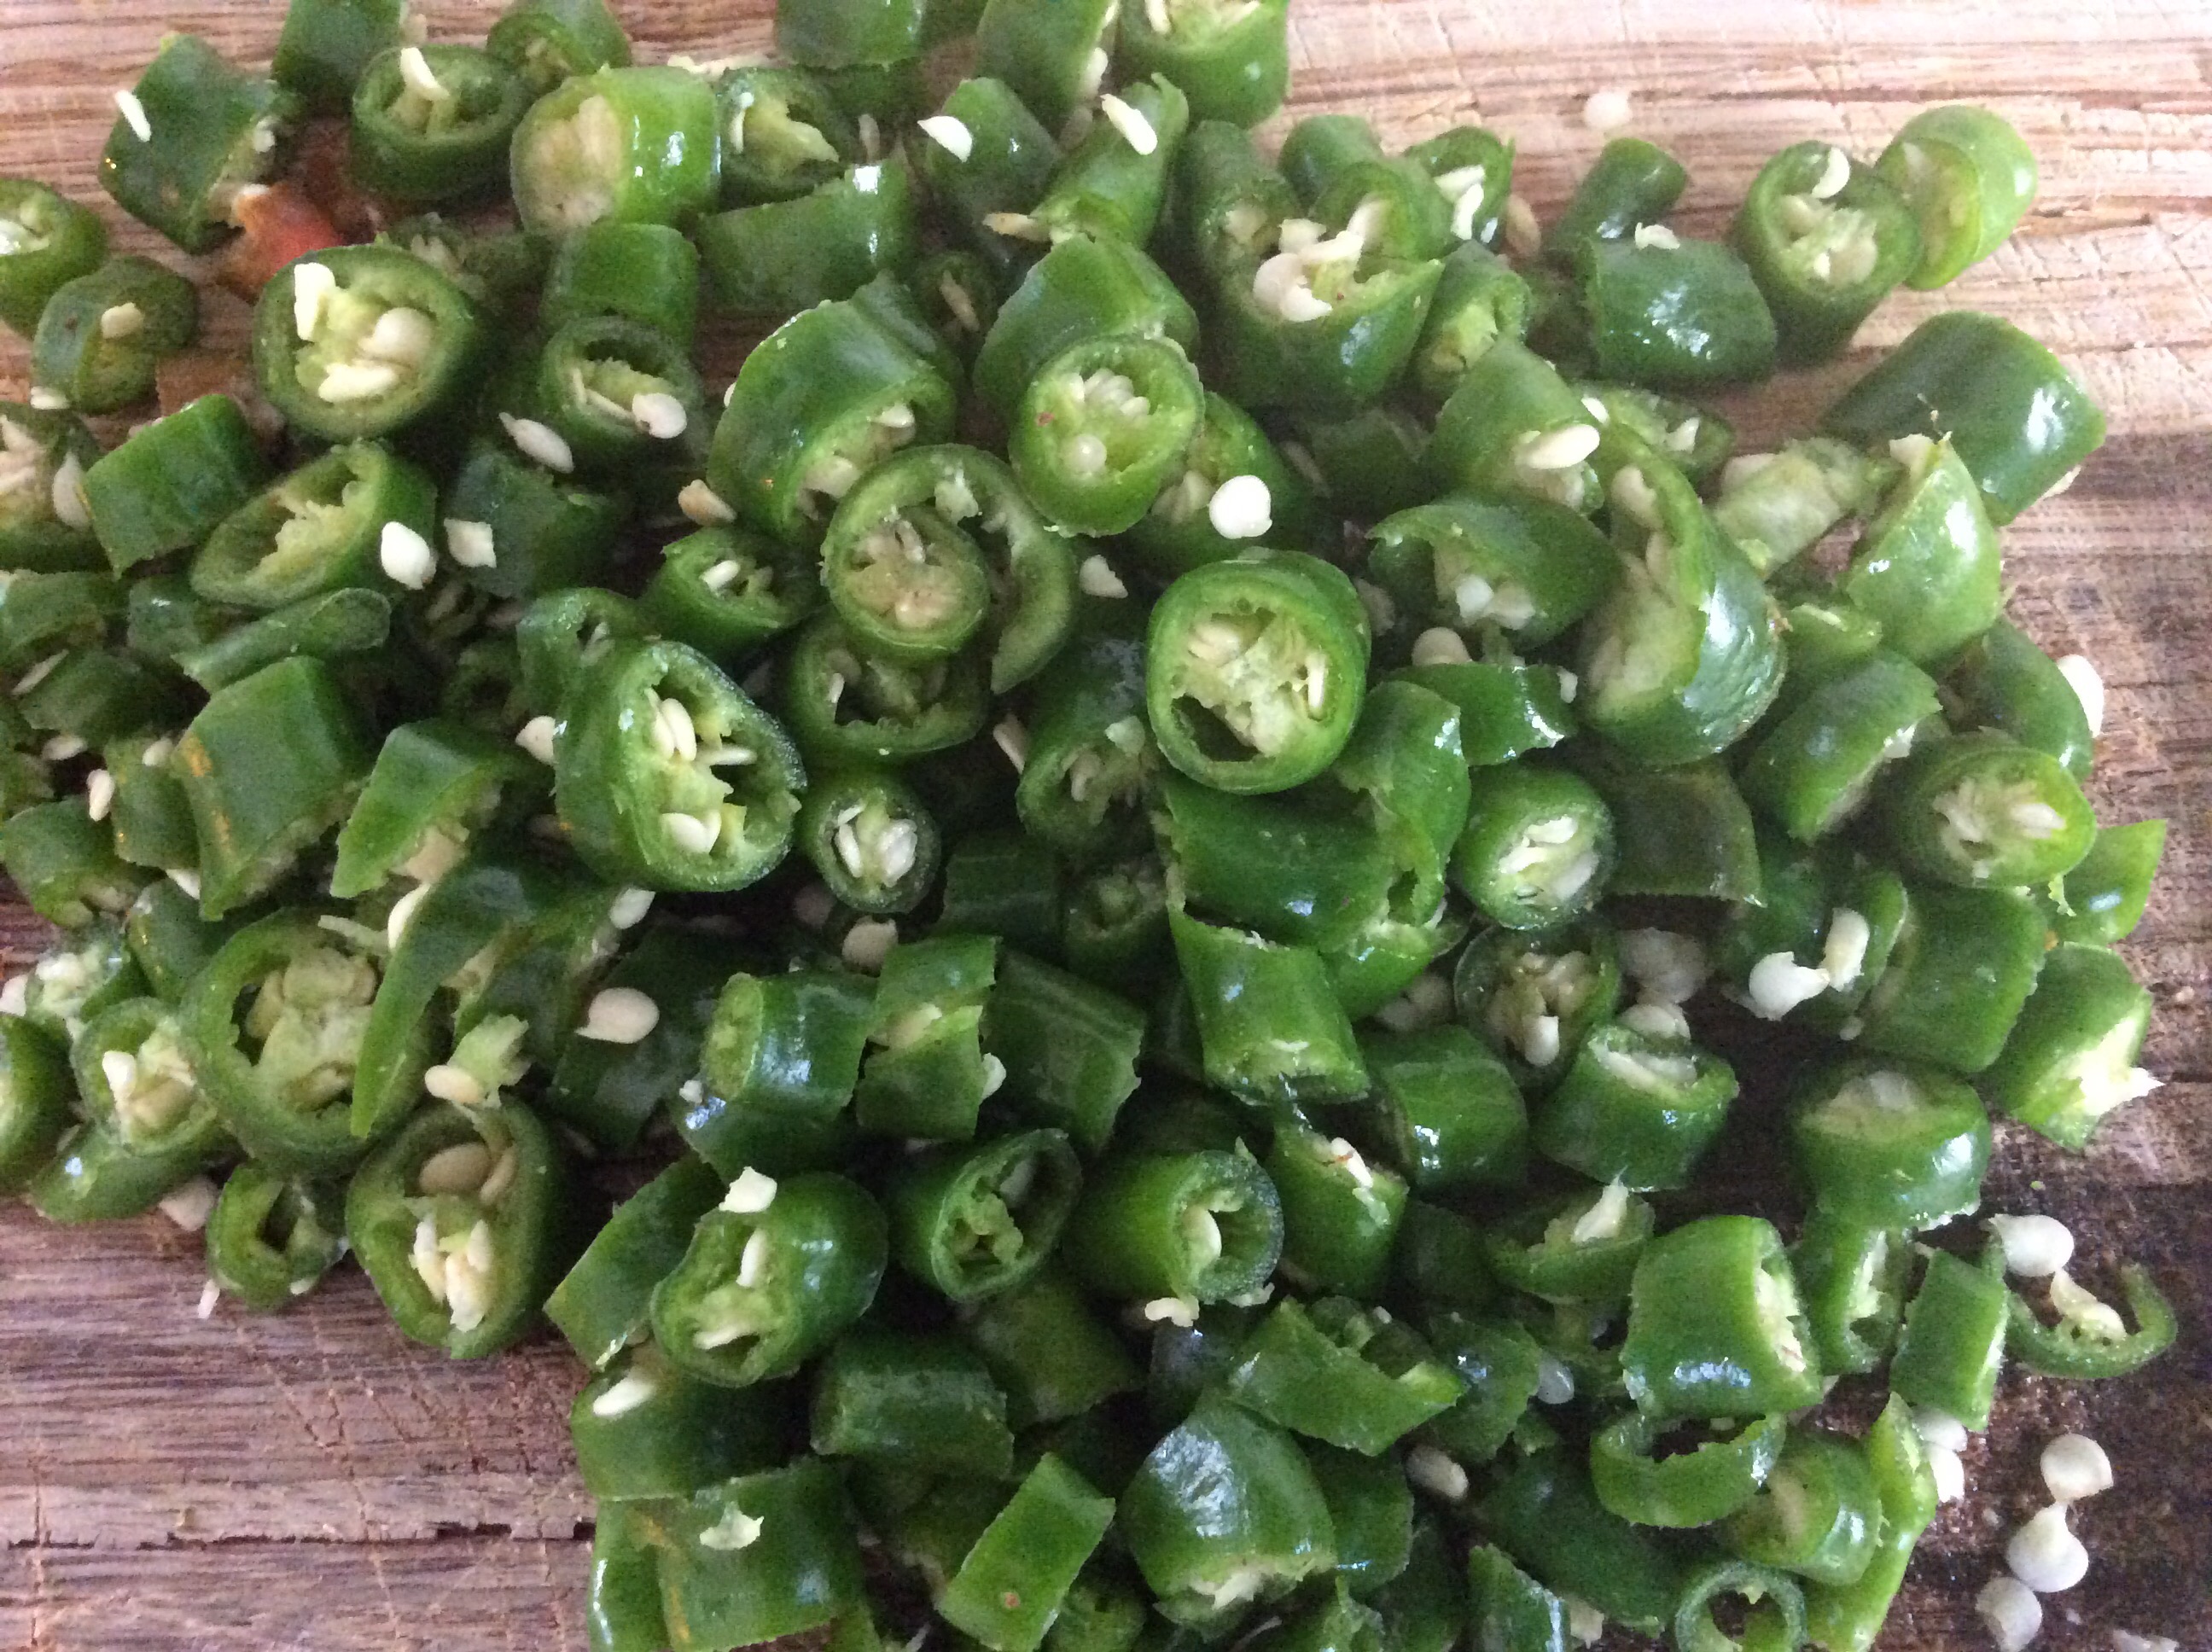
Top and tail the chillies and then chop in 1cm lengths.

Place in a large bowl and pour over the hot water.

Leave for 30 seconds and then scoop out with a slotted spoon.

Try and leave behind as many of the chilli seeds as possible – you don’t need or really want them all as they are pretty hot.

Place the chillies into the jar with the vinegar, sugar and salt solution.

Pop in the fridge and leave for a week before using.

If you have enjoyed this recipe, please have a look at my other ‘Easy’ ways to create great food here:

Easy Focaccia Bread

Easy Lemon Curd


Subscribe to Blog via Email

Enter your email address to subscribe to this blog and receive notifications of new posts by email.


Easy Soda Bread Without Buttermilk

Nothing quite like the smell of fresh baked bread is there? With this easy soda bread without buttermilk recipe you can get just that without all the kneading, proving and above all, without the waiting!

Most recipes for soda bread include the traditional buttermilk. I couldn’t get hold of it so used another home method of converting your milk into buttermilk. As with everything to do with this recipe, I did it the easy way. Put one table spoon of fresh or bottled lemon juice into your jug of milk. Within 5 minutes it’s doing its thing and turning into buttermilk.

4 from 1 vote
Easy Soda Bread Without Buttermilk
Prep Time
10 mins
Cook Time
35 mins
Total Time
45 mins
 

If you cant find buttermilk then this is great for you, if you can then use it and don't add the lemon.

Servings: 8
Ingredients
  • 1 tbsp Lemon juice
  • 300 ml Whole milk
  • 450 grammes Plain flour
  • 1 tspn Bicarbonate of soda
  • 1 tspn Salt
Instructions
  1. Pour the milk into a jug and add the lemon juice.

  2. Leave to stand for 5 minutes for it to turn into buttermilk

  3. While this is happening weigh out your other ingredients

  4. Put the flour, bicarbonate of soda and the salt in a large mixing bowl

  5. Pour in the buttermilk and combine together into a large ball

  6. Don't overwork but just form into the ball

  7. Place on a lined and floured baking tray

  8. Cook for 35-40 minutes on 180oc for a fan oven

  9. Test by putting in a wooden cocktail stick and if it comes out clear then it's done. Also tap on the bottom of the loaf and if it sounds hollow then that is a great sign

Easy Soda Bread Without Buttermilk

You’ll be so delighted with this bread, it has the look and taste of a deep tasty farmhouse style loaf.

I enjoy mine with lots of butter and cheese while my boys tend to go for black currant jam generously spread right up to the edges.

Easy Soda Bread Without Buttermilk
With my favourite stilton and cheddar cheese

Have a go and let me know how it turns out, I always love to hear.

If you are in the mood for some quick recipes while this is in the oven then try my One Step No Churn Ice Cream or Easy Lemon Curd.

Subscribe to Blog via Email

Enter your email address to subscribe to this blog and receive notifications of new posts by email.

Seriously Tasty Cheese Scone Recipe

Cheese Scones

When I was a young girl and staying with my nan on the weekends she would often bake with me. I remember the feel of the oversized apron tied around my waist, folded in the middle so that it wouldn’t trip me up.

One of the staple things we would bake together was scones; plain, fruit or cheese, all these would be made with her big hands over my little ones.

So, when I was looking for a tasty bake to make with my boys then cheese scones were a favourite choice.

The recipe and method are straightforward and ideas for moulding together quickly for a warm and wholesome savory treat.

Seriously tasty cheese scone recipe

4 from 1 vote
seriously tasty cheese scones recipe
Seriously Tasty Cheese Scones Recipe

As the title says, these are seriously tasty and what's more is that they can be made in the blink of an eye!

Ingredients
  • 200 g Plain Flour
  • 3 tsp Baking Powder
  • Half tsp Salt
  • 50 g Butter
  • 100 g Cheddar Cheese
  • 20 g Parmesan Cheese optional
  • 60 ml Cold Water
  • 60 ml Milk
  • 1 Egg used for glazing
Instructions
  1. Pre heat oven to 200 ºC (185 ºC if using a fan oven)

  2. Measure and put the Flour, Baking Powder and Salt into a mixing bowl

  3. Combine well
  4. Add the Butter and rub together with the tips of your fingers until it looks and feels like wet sand
  5. Grate the Cheese and mix through with a large spoon
  6. Add the Water and Milk
  7. Work together with your hands but don’t hand longer than necessary
  8. Put out onto a lightly floured surface
  9. Press down to a thickness of 2cm and cut out in rounds approximately 5cm wide
  10. Put onto a baking tray and cook for 15mins until golden
  11. Allow to cool a little on a wire rack.

Seriously tasty cheese scone recipe

If you fancy another easy comfort food dish that you can make while you’ve got the oven on then try my Easy Toad in the Hole recipe

Click to Share this Seriously Tasty Cheese Scone Recipe Click To Tweet

Thank you nan, this ones for you.

Seriously tasty cheese scone recipe

Subscribe to Blog via Email

Enter your email address to subscribe to this blog and receive notifications of new posts by email.

One Step No Churn Ice Cream with Salted Caramel Baileys

Honestly this ice cream recipe is so easy that it barely makes a full post, I just need to shout it from the rooftops so that everyone can hear.

You don’t need an ice cream maker, you don’t need to stir it part way through the freezing process, it really is One Step No Churn Ice Cream. My other half loves his Baileys or Irish cream liqueur. Just to be clear, this post is not sponsored or endorsed and I haven’t been paid mega bucks *I wish!* to endorse any brand. It’s purely his treat and this salted caramel version was screaming out to be poured into this creamy ice cream.

The quantities I have included in the recipe below make enough for 4 tubs of this gorgeous ice cream. If you want to make for fewer people then it’s still perfect if you half the quantities and make less.

The addition of the alcohol does make it a bit smoother and easier to scoop. Can you make it without the alcohol?…Sure, there are so many varieties to choose from. Salted Caramel syrup without the liquer part will be just as tasty.

One Step No Churn Ice Cream with Salted Caramel Baileys
Click to share!Click To Tweet
5 from 4 votes
One Step No Churn Ice Cream with Salted Caramel Baileys
Prep Time
5 mins
freezing time
5 hrs
 

Probably the easiest ice cream you will ever make. The most delicious too! This will make 4 medium tubs similar to the luxury brand ones from your local supermarket.

Course: Dessert
Servings: 16
Author: mainy - myrealfairy
Ingredients
  • 600 ml Double Cream
  • 390 g Condensed Milk Sold in cans
  • 3 tbsp Salted Caramel Baileys Irish Liqueur Or supermarkets own brand
Instructions
  1. This is a one step recipe....

  2. Place all of the ingredients into a mixing bowl, whisk until soft peaks are formed.

  3. Pour into a suitable freezable container with a tight fitting lid. Place in the freezer for 5hrs or more.

Recipe Notes

Ready to eat after 5hrs of freezing. Lots of different flavours to choose from. Experiment and enjoy!

Mainy

Subscribe to Blog via Email

Enter your email address to subscribe to this blog and receive notifications of new posts by email.

Pesto made with carrot tops. You have to try this!

This dish is so easy to make and the idea that you can make super yummy pesto made with carrot tops is a great idea. The amount of green carrot tops that just end up in the food bin is really daft and finding that they can be put to good use is pretty cool.

We have been growing vegetables this year which you can see in my free pallet patio garden post and you can actually see the carrots as they started off there. They have come out all shapes and sizes which is really cute.

pesto made with carrot tops

We eat lots of pasta at home and it’s a really quick supper for our family which can fit in with our busy homelife. Pesto has long been a favourite but I had rarely made it before. Then when I was looking for ways to use the leftovers from some of my home grown vegetables I stumbled across someone saying to try it in pesto. I adapted the general idea and had a play and came up with this recipe which is quick, easy and very adaptable to the amount of ingredients you have to hand.


pesto made with carrot tops
One of the many advantages of this recipe is that it’s an all in one recipe. Everything into the mixer and blitz for a couple of minutes.

pesto made with carrot tops

Once made you can store for up to two weeks in an airtight container in the fridge. Try it out on chicken or tofu too.

4.34 from 3 votes
Pesto made with carrot tops
Prep Time
10 mins
Total Time
10 mins
 

This delicious Pesto made with the leafy green carrot tops adds a new dimension to Pesto Pasta. Also great to be smothered over meat or vegetables for your BBQ or main meal

Course: Main Course
Servings: 6 people
Author: Mainy - myrealfairy.com
Ingredients
  • 100 ml Rapeseed Oil
  • 1 bunch Green leafs from carrot tops
  • 1 clove Garlic
  • 10 leaves Basil
  • 1 handful Hazelnuts
  • 25 grammes Parmesan cheese
Instructions
  1. Wash the leafy tops of the carrots well in cold water to remove any soil

  2. Peel a garlic clove

  3. Put all of the ingredients into a small blender with a chopping setting.

  4. Whizz for approximately 2 minutes until it is all chopped to a smooth paste

Please click and share this quick and easy recipe:)Click To Tweet

Subscribe to Blog via Email

Enter your email address to subscribe to this blog and receive notifications of new posts by email.

Sausage, Greens and Beans Pasta – Guest Post

Sausage, Greens and Beans Pasta With a Simple Professional Twist


This hearty, one-dish meal involves a pasta making method frequently used by professional chefs—yet it’s simple enough for weeknight dinners. In this recipe, the pasta is partially cooked in water and then finished in a glossy parmesan sauce. And although the recipe calls for rigatoni, you can easily substitute any type of large tubular pasta.


Buy dry cannellini beans in bulk to save money, and cook large amounts of them at a time, freezing small portions for use in other recipes (or more sausage, greens and beans pasta!). If you prefer the convenience of canned beans, use a 15.5-ounce can instead—just make sure to rinse and drain them first.


You can use any type of Italian sausage in this recipe: loose or links, sweet or spicy. If you opt for link sausage, remove and discard the casings before frying the meat. Note that there is also flexibility in the liquid and greens used, with options for either white wine or broth and kale or escarole. Swiss chard works well, too, and adds some fun color to the dish.


We recommend using a Dutch oven for this recipe, though any heavy pot with high sides will do. Just don’t use your pasta pot—you’ll need that too! Remember to reserve the cooking liquid after boiling the pasta, as you will need this for the sauce. Instead of pouring the pasta into a colander, use a large slotted spoon or a spider, if you have one, to transfer the pasta from one pot to the other.


Enjoy!

Sausage, Greens and Beans Pasta

Serves 4


Ingredients:

  • 1/3 c. olive oil
  • ½ tsp. dried rosemary
  • 8 oz. Italian sausage
  • 1 ½ c. cooked cannellini beans
  • ¼ c. dry white wine or broth
  • 12 oz. rigatoni
  • 8 c. chopped kale or escarole
  • ¾ c. finely grated parmesan
  • Salt and pepper
  • 2 tbsp. unsalted butter


Directions:

  • Fill a large pot with water and put on the stove to boil.
  • Meanwhile, heat half the oil in a large Dutch oven or heavy pot, then add the sausage and fry until browned and fully cooked, about 8–10 minutes.
  • Transfer the sausage to a plate using a slotted spoon.
  • Add the pasta to the boiling water and cook 3 minutes less than what the package calls for.
  • While the pasta cooks, add the remaining oil along with the beans and rosemary to the Dutch oven. Cook over medium-low heat for about 5 minutes or until browned in spots, tossing the beans and mashing some with a wooden spoon.
  • Remove half of the beans and place on the plate with the sausage.
  • Add the wine or broth to the Dutch oven, bring to a boil, and cook until nearly evaporated.
  • Transfer the pasta to the Dutch oven (reserve cooking water).
  • Add the kale and 1 cup of the pasta water. Cook while tossing with tongs until the kale is wilted, pasta is al dente, and sauce has thickened, about 4 minutes.
  • Add an additional ¼ cup of pasta water. Sprinkle in ½ cup cheese, tossing gently until you have a glossy sauce.
  • Add more pasta water as needed to achieve desired consistency.
  • Season with pepper and salt, if desired, then add the butter and toss until melted.
  • Stir in the sausage and reserved beans.
  • Serve warm with parmesan cheese sprinkled on top.


Guest Post Author’s Bio:


Melissa is a freelance writer and food blogger at recipe-barn.com. She is very passionate about cooking, creating and sharing unique recipes or just simply cooking good food. Melissa has also developed an interest in a variety of other things including healthy diet and traveling in new places around the globe to experience different cuisines and learning different cultures.


Subscribe to Blog via Email

Enter your email address to subscribe to this blog and receive notifications of new posts by email.


Easy Bake Chocolate Florentines

These Easy Bake Chocolate Florentines biscuits are so delicious that I actually made two batches before I managed to get the pictures of the finished article because I forgot on the first night  and by the next day they were nearly all gone!

If you have not had a Florentine before, then they are thin biscuits made with nuts and cherries and normally coated with chocolate on the flat underneath side. They are slightly crisp on the edges and then a fabulous chewy centre awaits!

I now coat half of the batch with chocolate and I leave half uncoated and I kid you not, they are both gorgeous.

The full recipe and directions are below and some handy photos here to reassure you of what it should look like at each stage.


Easy Bake Chocolate Florentines
The mixture as it should look just before baking.
Easy Bake Chocolate Florentines
You only need a teaspoon per biscuit!

Easy Bake Chocolate Florentines

It is best to temper the chocolate and I have written a quick reference post on how to do this the easy way if you are a home cook like me.

Easy Bake Chocolate Florentines
Coat as many as you like in the chocolate.
5 from 1 vote
Easy Bake Chocolate Florentines
Prep Time
5 mins
Cook Time
15 mins
Total Time
20 mins
 

These super elegant Florentines are a perfect easy bake which produce the most delicious crispy, chewy, mouth-watering biscuits.

Course: Sweet Treat
Servings: 24
Author: mainy - myrealfairy
Ingredients
  • 50 g Butter
  • 50 g Demerara sugar
  • 50 g Golden syrup
  • 50 g Plain flour
  • 50 g Flaked almonds
  • 25 g Glacé cherries
  • 200 g Dark chocolate
Instructions
  1. Preheat your oven to 180°C/350°F/Gas Mark 4. 

    Prepare your baking trays with parchment paper/grease proof paper for baking

  2. Add the butter, sugar and the golden syrup to a small saucepan and heat gently until the butter has melted. 

    When this has melted down, remove from the heat and add the flour, glacé cherries and flaked almonds.

    Easy Bake Chocolate Florentines
  3. Mix well with a large wooden spoon.

  4. Using a teaspoon, put one level teaspoon onto the baking tray and space 6 spoonfuls evenly over the baking tray. Space well as the mixture spreads during baking.

    Easy Bake Chocolate Florentines
  5. Bake for between 8 and 10 minutes, or until golden-brown. Let them cool on the baking trays before transferring to a cooling rack to cool down completely.

    Easy Bake Chocolate Florentines
  6. Melt the chocolate and temper using the method from my link. On the flat side of the florentine, spread a little melted chocolate until it is evenly covered. Wait 30 seconds and using a fork or the tip of the teaspoon, create a zig zag engraved effect in the chocolate.

Recipe Notes

Only use a teaspoon per biscuit as they spread more than you think!

Tweet to share this Easy Bake Chocolate Florentines RecipeClick To Tweet

Subscribe to Blog via Email

Enter your email address to subscribe to this blog and receive notifications of new posts by email.

How to Temper Chocolate the Easy Way

When I made my first recipe which needed me to temper the chocolate I was quite intimidated by the process and didn’t go too much further. Suffice to say that I had alot of split, grainy chocolate melting disasters!

So after doing some further research and trialing easy tempering methods I want to share the method that I use all the time now, with you.

Tempered chocolate has a glossy appearance to it and will have that snap to it that sounds just right. there is a science behind tempering chocolate which involves heating to the right temperature so that when the chocolate is heated and the fat molecules go out of alignment they need to be realigned correctly or the chocolate will ‘bloom’. This is when the chocolate looks grey and grainy and not as appealing as the glossy look we should go for. I’m sure there has been a time when you have left a chocolate bar in the car and it’s got warm and melted. The texture it then goes when it firms up is never quite the same is it? That’s because it has gone out of temper.

I use the method of heating in a heatproof dish over a pan of simmering water. I tried the microwave methods but I didn’t get on with it and prefer having more control by using the pan method.

Make sure the bowl can sit in the pan without touching the water. Also, the bowl must be kept very dry and not let any water inside.

Tempering Method

From a large bar of dark chocolate with a cocoa content of between 50-70%, break off three quarters of the bar and chop into small chunks.

Place these in the bowl and over the pan of simmering water.

Over the next 1-2 minutes these will melt.

When they have melted, take the bowl off the heat and stir quickly.

Put in the remaining chocolate.

Stir in continuously until it is all melted.

That’s it, you are now ready to dip or spread your chocolate onto your tasty treats.

how to temper chocolate the easy way

If you love chocolate recipes as much as I think you probably do then have a look at my Ultimate Chocolate Brownie Recipe and my Chocolate Vegan Cake. 

Enjoy and let me know what you think! I’d love to hear your ideas too.

Click to share this easy guideClick To Tweet

Subscribe to Blog via Email

Enter your email address to subscribe to this blog and receive notifications of new posts by email.

Best Baba Ganoush

I have been growing Eggplant or Aubergine as I know it better in my garden during the summer. I’ve loved growing them but they are quite labour intensive and the plants are really large. There are easier plants to grow but the results are so delicious that it is well worth the effort in the end.

I have managed to harvest these cute fruits. Yes they are fruits but are commonly used and eaten as a vegetable. Whatever they are classed as, these little gems are beautiful and sweet when roasted.

I wanted to make the Best Baba Ganoush dip that I could and have the perfect recipe that show off their sweet flavour.

Click to share the love and treat others to this recipeClick To Tweet
5 from 1 vote
Baba Ganoush
Prep Time
10 mins
Cook Time
40 mins
Total Time
50 mins
 

A Silky Egg Plant Dip ideal for all occassions

Course: Snack
Servings: 6
Author: mainy - myrealfairy
Ingredients
  • 1 Egg Plant (Aubergine)
  • 2 tbsp Tahini Paste
  • 1 whole Garlic Clove
  • Salt and Pepper
  • 1 pinch Ground Cumin
  • 1 tbsp Olive Oil
Instructions
  1. Preheat the oven to 200 oc

     Wipe clean the skin of the eggplant.

    Place the eggplant halves, flesh side down, on a lightly oiled baking sheet then drizzle with olive oil. Bake for 30-40 minutes or until the eggplant fully softens through. 

    Remove from the oven and set aside to cool.

    When it is cooled, scoop out the flesh out and transfer to a food processor. 


  2. Do not use the skins in the dip, just the flesh.

  3. Add the garlic, lemon juice, ground cumin, olive oil and tahini paste. 

  4. Process until you achieve a puree consistency. 

  5. Add salt and pepper to your personal taste.

Recipe Notes

Top with a little olive oil and fresh coriander for garnish and aroma.

Let me know what you think to this and have you tried to grow your own?

Subscribe to Blog via Email

Enter your email address to subscribe to this blog and receive notifications of new posts by email.

Carrot and Gogi Berry Loaf Cake

I’ve been wanting to make a carrot cake for a little while now and I wanted to give it a bit of a twist, something to make it stand out from the crowd. Well I have done just that! Adding Gogi Berries to it has given it a lift and a flash of colour, I love it!

I’ve used Gogi berries before and was looking for other recipes I could adapt so that I could make even more use of this yummy fruit.

Carrot and Gogi Berry Loaf Cake
4 from 1 vote
Carrot and Gogi Berry Loaf Cake.
Carrot and Gogi Berry Loaf Cake
Prep Time
10 mins
Cook Time
35 mins
Total Time
45 mins
 

Add a twist of something special to this lovely Carrot cake with these super cool Gogi Berries

Course: Dessert
Servings: 10
Ingredients
  • 50 g Dark brown sugar
  • 2 Eggs
  • 125 ml Rapeseed Oil
  • 3 large Carrots
  • 50 g Gogi Berries
  • 150 g Plain Flour
  • half teaspoon Baking Powder
  • half teaspoon Bicarbonate of Soda
  • 1 teaspoon Mixed Spice
  • 30 ml Maple Syrup
Instructions
  1. Grate the carrots (these will be part of your wet ingredients)

  2. Mix all of the dry ingredients together apart from the Gogi Berries in one bowl then set aside.

  3. In a food mixer put all of the wet ingredients and mix until combined.

  4. Combine together and add the Gogi Berries.

  5. Pour into a medium loaf tin

  6. Bake for 35 mins on 170oc

This is great to use up some of those extra ingredients you might have around the store cupboard. Another easy recipe which big results is my Cheese Scones which are super quick. If you fancy a sweet treat try my Ultimate Chocolate Brownies!

Quick tip!

If you want to rehydrate dried Gogi berries then pop them in a bowl or cup, pour over boiling water and leave for 10 minutes. Drain well and then they are plump and juicy, ready to use.

Subscribe to Blog via Email

Enter your email address to subscribe to this blog and receive notifications of new posts by email.