Thought of the day

Welcome to myrealfairy.com

thought of the day

Hello and welcome! Have a look at the menu and see what takes your fancy! Recipes, reviews and tips on how to navigate the parenting world…..well, we try! 🙂

my real fairy

Any thoughts are welcome on this site, I love to hear your views. What would you like me to review next on myrealfairy.com?

If you are a brand, small business or voluntary organisation then please get in touch.

If you would like to contribute an article then I’d like to hear from you.

Drop me a line at fairyqueen@myrealfairy.com

Enjoy reading

Mainy x 

elf-1088191_1920 (1)

The Best Butternut Squash Recipe

I like to try all the different vegetables on offer and this week I had an organic box delivery which had a great Butternut Squash nestled inside.

I wanted to make the most of what I could do with it so I have devised the best butternut squash supper recipe I can imagine which is great for all the family.

Luckily my boys and OH love their food and will try all the different dishes that I come up with. My eldest son loves sweet potatoes and I think that the butternut squash looks very similar. They have had it before but not like this, being made the star of the show!

The Best Butternut Squash Recipe
Quartered and with the seeds removed
4.8 from 5 votes
The Best Roasted Butternut Squash Recipe
The Best Butternut Squash Recipe
Prep Time
10 mins
Cook Time
40 mins
Total Time
50 mins
 

The Best Butternut Squash Recipe. Great for all the family to enjoy.

Course: Main Course
Servings: 6 people
Author: mainy - myrealfairy
Ingredients
  • 1 Butternut Squash
  • 1 tbsp Olive Oil
  • Salt and Pepper To personal taste
  • 200 g Quinoa
  • 50 g Parmesan Cheese
Instructions
  1. Slice the Butternut Squash into 4 or 6 slices depending on how large it is.

    Place on a baking tray with lining paper

    Sprinkle on the olive oil

    Add salt and pepper to taste


    The Best Roasted Butternut Squash Recipe
  2. Roast in the over for 40 minutes

  3. Cook the Quinoa for the required time depending on pre cooked or part cooked.

  4. Take the Butternut Squash out of the oven and immediately grate over the parmesan cheese. 

  5. Serve straight away with the cooked Quinoa.

    The Best Roasted Butternut Squash Recipe
Recipe Notes

Tastes great with shredded cabbage!

Tweet this recipe with a single click! Thank you xClick To Tweet

I’d love to know that you think of this supper dish and if you are a fan of butternut squash.

the best butternut squash recipe

If you like easy, delicious recipes then I think you will love my Easy Focaccia Bread. Try these two together and wow your friends and family.

the best butternut squash recipe

Subscribe to Blog via Email

Enter your email address to subscribe to this blog and receive notifications of new posts by email.

Vegan Chocolate Cake Recipe

This vegan chocolate cake recipe is one to keep. I came across the idea when I realised there were many more people that I know who are either vegan or who are removing some areas of food from their diet. There are so many ways in which we can tweak our favourite recipes to meet our own requirements.

With my vegan chocolate cake it does not contain any eggs or butter. The standard sugar has been replaced with Natvia sweetener – Natvia is made from the stevia plant and is completely natural – and the oil is vegetable oil.

This is a cake that is so versatile. It’s perfect with a hot coffee, if you fancy a summer party then adding fresh fruit will put the sunshine feeling into the day, or if it’s luxury you are after then vegan hazelnut frosting is something that will top this off a treat!

vegan chocolate cake


See how easy it is to make….


5 from 1 vote
vegan chocolate cake
Vegan Chocolate Cake
Prep Time
15 mins
Cook Time
45 mins
Total Time
1 hr
 

This No Egg, No Butter, Vegan Chocolate Cake is delicious! Try it out with fresh fruit or a hot steaming coffee. You can upgrade this to the best wedding cake with vegan frosting, it's so versatile. 

Course: Dessert
Cuisine: Worldwide
Servings: 12
Author: mainy - myrealfairy
Ingredients
  • 1 lb Plain Flour
  • 12 oz Natvia Natural Sweetener
  • 3 oz Cocoa Powder
  • 3 teaspoon Bicarbonate of Soda
  • 8 fl oz fl oz Vegetable Oil
  • 1 pint Water
  • 1 teaspoon Vanilla Extract
  • 1 teaspoon Cider vinegar
Instructions
  1. Measure out your dry ingredients and mix these together in a large bowl.
    vegan chocolate cake
  2. Add your wet ingredients and blend these in making a smooth paste.
    vegan chocolate cake
  3. Line an 8 inch (22cm) loose bottomed cake tin with parchment.
  4. Carefully pour into the tin.
    vegan chocolate cake recipe
  5. Bake in a pre-heated oven for 45 minutes.
Recipe Notes

Insert a clean toothpick into the centre of the cake to see if it is baked. If the toothpick comes out clean then it’s done!


vegan chocolate cake

Share the love with clicking here to show your friends this great recipe xClick To Tweet

I’d love to hear your thoughts and please rate the recipe if you like the look of it or if you have tried it.

Subscribe to Blog via Email

Enter your email address to subscribe to this blog and receive notifications of new posts by email.

I was given one pack of Natvia Sweetener to try. It works and tastes great in this cake!

Chocolate and Cherry Tiffin – Guest Post Recipe

Guest Posting for me today is Ruth, a 36 year old, mum of two from the West Midlands. Ruth’s a Lifestyle blogger, High school teacher and full time tea drinker.

Ruth blogs at www.craftwithcartwright.co.uk where she writes about recipes, reviews, parenting and crafts. Pop along when you’ve seen this yummy recipe and see her on her blog.

Chocolate and Cherry Tiffin Recipe.

Tiffin is a cold set hard pressed chocolate and biscuit combo. You’ll have to go far to find anything more deliciously chocolatey, sweet and crumbly. It is moreish beyond belief. In an attempt to make it slightly healthier I’ve added dried cherries, you could also try sultanas, cranberries or even figs. But be warned this is a calorific treat and should not be consumed in one sitting.

I also included in brackets how to make it gluten free, which is pretty simple with some ingredient substitutions.

You will need:

  • 225g digestive biscuits, (gluten free version) crushed
  • 100g dried cherries
  • 100g butter
  • 25g sugar
  • 3 tbsp cocoa powder (check gluten free)
  • 4 tbsp golden syrup
  • 225g plain chocolate (check gluten free, I use green and Blacks)


  1. First crush the biscuits in a food processor or a sealed food bag with a rolling pin.
  2. Then tip the crushed biscuits into a large mixing bowl and add the dried cherries.
  3. Melt the butter, sugar, cocoa powder and golden syrup over a low heat in a heavy based saucepan.
  4. Once melted, combine the butter mixture with the biscuits in the mixing bowl.
  5. Press the mixture into an 8” square tin and leave to cool.
  6. Once cool, melt the chocolate in a bowl sat over a saucepan of simmering water or in a microwave.
  7. Then spread it over the top of the biscuit mixture whilst still in the tin.
  8. When set, remove the tiffin from the tin and cut into squares using a sharp knife.

Chocolate and cherry tiffin guest post

5 from 1 vote
Chocolate and cherry tiffin guest post
Chocolate and Cherry Tiffin
Prep Time
10 mins
Cook Time
5 mins
Total Time
15 mins
 

You’ll have to go far to find anything more deliciously chocolatey, sweet and crumbly. It is moreish beyond belief. 

Course: Dessert
Servings: 12
Ingredients
  • 225 g digestive biscuits gluten free version
  • 100 g dried cherries
  • 100 g butter
  • 25 g sugar
  • 3 tbsp cocoa powder check for gluten free
  • 4 tbsp golden syrup
  • 225 g plain chocolate check for gluten free
Instructions
  1. First crush the biscuits in a food processor or a sealed food bag with a rolling pin.

  2. Then tip the crushed biscuits into a large mixing bowl and add the dried cherries.

  3. Melt the butter, sugar, cocoa powder and golden syrup over a low heat in a heavy based saucepan. 

  4. Once melted, combine the butter mixture with the biscuits in the mixing bowl.

  5. Press the mixture into an 8'' square tin and leave to cool.

  6. Once cool, melt the chocolate in a bowl sat over a saucepan of simmering water or in a microwave. 

  7. Then spread it over the top of the biscuit mixture whilst still in the tin.

  8. When set, remove the tiffin from the tin and cut into squares using a sharp knife.


Let others know about this chocolate and cherry delight, they will love it!Click To Tweet

Subscribe to Blog via Email

Enter your email address to subscribe to this blog and receive notifications of new posts by email.

Easy Granola Recipe

This Easy Granola Recipe can be made with or without the seeds and berries depending on your preference.

What you will need is:

3 cups of Porridge Oats

1 Tablespoon of honey or fruit syrup

A sprinkle of:

Dried Goji berries

Pumpkin seeds

Sunflower seeds

Jumbo flame raisins

Here’s what you need to do using the photos and some very easy steps…

Easy Granola Recipe www.myrealfairy.com

Mix the honey or syrup into the oats in a large bowl so that they are covered.

Easy Granola Recipe www.myrealfairy.com

Line a baking tray with parchment. Spread the oats in a thin layer. Bake on a medium heat for 10 minutes stirring once after 5 minutes. Make sure you keep an eye on them as they can go from bronze to burnt very quickly.

Easy Granola Recipe www.myrealfairy.com

Mix in your choice of dried fruits and nuts and place back in the oven for 2 minutes. Take out of the oven and mix well.

Leave to cool before placing in an airtight container.


EASY GRANOLA RECIPE www.myrealfairy.com


Great Easy Granola, share with your friends this healthy recipe! Thank you!Click To Tweet
5 from 1 vote
EASY GRANOLA RECIPE
Easy Granola Recipe
Prep Time
5 mins
Cook Time
12 mins
Total Time
17 mins
 
Course: Breakfast
Servings: 7
Author: www.myrealfairy.com
Ingredients
  • 3 Cups Porridge Oats
  • 1 Tbsp Honey or Fruit Syrup
  • Sprinkle Dried Goji Berries
  • Sprinkle Pumpkin Seeds
  • Sprinkle Jumbo Flame Raisins
Instructions
  1. Mix the honey or syrup into the oats so that they are covered.

  2. Line a baking tray with parchment.

  3. Spread the oats in a thin layer. Bake on a medium heat for 10 minutes stirring once after 5 minutes. Make sure you keep an eye on them as they can go from bronze to burnt very quickly.

  4. Mix in your choice of dried fruits and nuts and place back in the oven for 2 minutes. 

  5.  Take out of the oven and mix well.

  6. Leave to cool before placing in an airtight container.

Subscribe to Blog via Email

Enter your email address to subscribe to this blog and receive notifications of new posts by email.

#guestpost week featuring Blissful Domestication

Today on #guestpost week we have the lovely Kerry from Blissful Domestication She has made this wonderful chocolate mug cake that looks totally scrummy. Over to you Kerry…..

Chocolate Mug Cake

I think these would make a great novel dessert for a dinner party, and as they only take 5-10 minutes to rustle up, you can impress your friends with minimal effort. I will be buying some prettier mugs for this very purpose!

As an added bonus of having chocolate cake in less than 10 minutes (as if one is needed!), because all the ingredients are mixed in the mug there is very little washing up to do- it’s win win really!

Ingredients
  • 30g butter
  • 4 tbsp hazelnut chocolate spread
  • 1 egg
  • 3 tbsp light brown sugar
  • 4 tbsp plain flour
  • 1/2 tsp baking powder
Method
  • Put the butter and 3tbsp of the chocolate spread in the mug, and microwave for 30 secs to melt. Mix together well.
  • Allow to cool slightly, then add the egg and beat well using a fork.

  • Add the sugar, flour and baking powder and mix in well with the fork until all the ingredients are incorporated.

mug cake #guestpost week www.myrealfairy.com

  • Cook in the microwave for 30-40 seconds.
  • Spoon the last tbsp of chocolate spread into the middle, and cook for a further 40 seconds.
  • The top of the mug cake may look a bit moist, but if it is firm underneath it is done. Don’t be tempting to cook for longer as it can dry out the middle.
  • Sometimes the cake can spill over the edge, just wipe away any spilt cake mixture with a clean damp cloth whilst it is still warm.
  • I chose to just sprinkle the top of mine with icing sugar, but you could get more inventive and use cream, chocolate chips, nuts, anything you fancy really.
  • Enjoy!


NB. I am a home cook, and have had no formal training in preparing food. So these are just recipes that I use at home for the family. Whilst I have taken time to try and be as accurate as possible, some of the quantities are approximate.  I am always keen to learn, so if you think the recipe can be improved upon please take the time to comment below.

Thank you Kerry for being involved in this #guestpost series. Brilliant to have you featured here and I cant wait to try cake in a mug – genius. You can find out more about Kerry by visiting her social media sites below:

Twitter: @blissfulkerry

Facebook: blissfuldomestication

I'd love you to let people know about the #guestpost week here on the blogClick To Tweet

Subscribe to Blog via Email

Enter your email address to subscribe to this blog and receive notifications of new posts by email.

Easy Cranberry Sauce Recipe

This is a great easy cranberry sauce recipe as it is so quick to make. Also it has just 3 ingredients. It couldn’t be simpler to prepare, even at short notice as it only takes 15 minutes. Super tasty and looks great too. I love it with any of my christmas roasts and it can be used with your desserts too. I enjoy putting it with mince pies and cream.

What you will need is:

12oz cranberries

1 cup of sugar

1 cup of orange juice


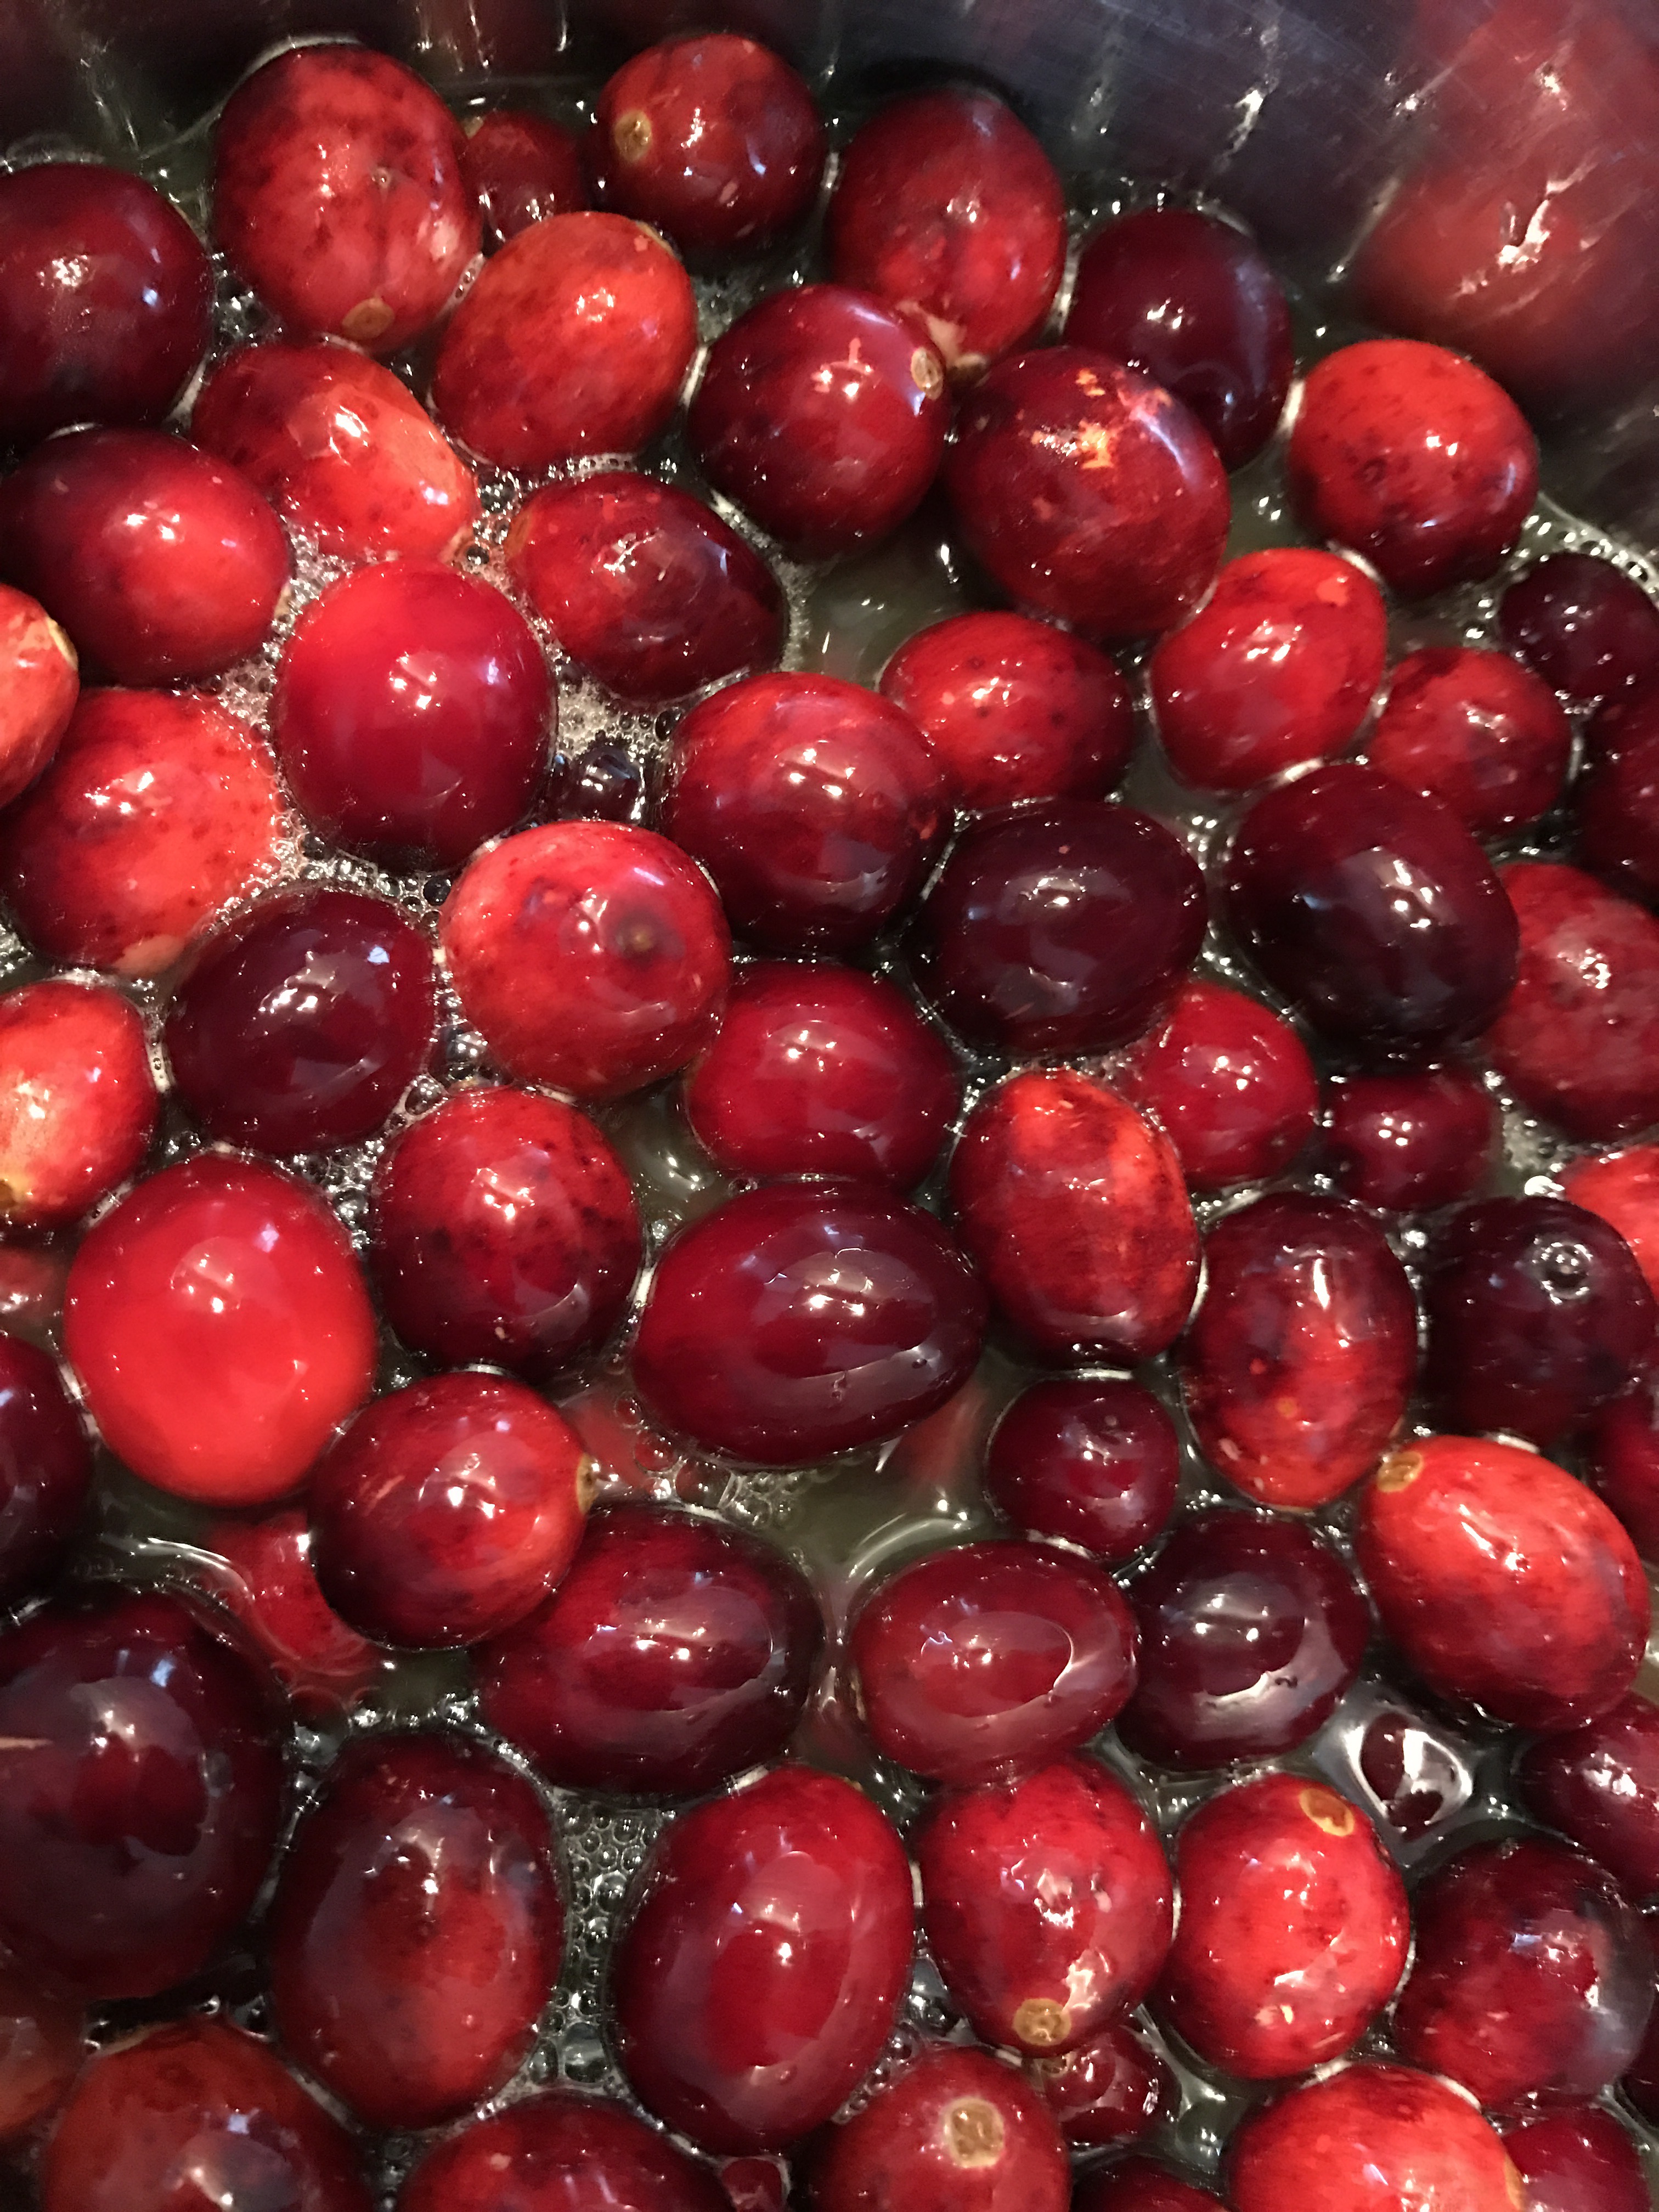
Start by washing the cranberries in cold water and drain.

Place the orange juice and sugar in a large saucepan.

Stir together and bring to the boil.

When it’s reached boiling point turn down the heat to medium and stir until the sugar is dissolved.


Easy Cranberry Sauce Recipe www.myrealfairy.com

Add the cranberries and bring to a gentle simmer. You will hear and see them pop a little. Be careful of splashes so don’t get too close. Simmer for 10 minutes.

Easy Cranberry Sauce Recipe www.myrealfairy.com

Remove from the heat.

Leave to cool until they reach room temperature.

Place in jars. It can be stored for up to 2 weeks in the fridge.

easy cranberry sauce recipe


It can also be frozen. If you want to do this then pop it into a freezer bag or appropriate plastic container and freeze when cool.

Want to share this easy recipe with your friends? Go ahead and tweet away:) Thank you!Click To Tweet


Subscribe to Blog via Email

Enter your email address to subscribe to this blog and receive notifications of new posts by email.